5 year guarantee
Free Delivery
Bespoke Design
Tips on fitting our Sliding Wardrobes
Sliding wardrobe doors are easy to install. We have provided a fitting guide which we recommend you follow for a successful installation.
Your doors, tracks and additional purchases will be delivered in one shipment. Please note we do not supply any of the tools or screws required to install your sliding wardrobe door set.
Please check upon delivery for any damage.
Suggested Tools
- Tape Measure
- Hacksaw
- Jigsaw
- Drill
- Drill bits (various sizes)
- Screwdrivers
- Screw, rawplugs and L Brackets
The following items may be useful too : Panel adhesive, Spirit level, plumb line, decorators caulk , masking tape and sandpaper.
Now you are ready to follow the guidelines below for installation.
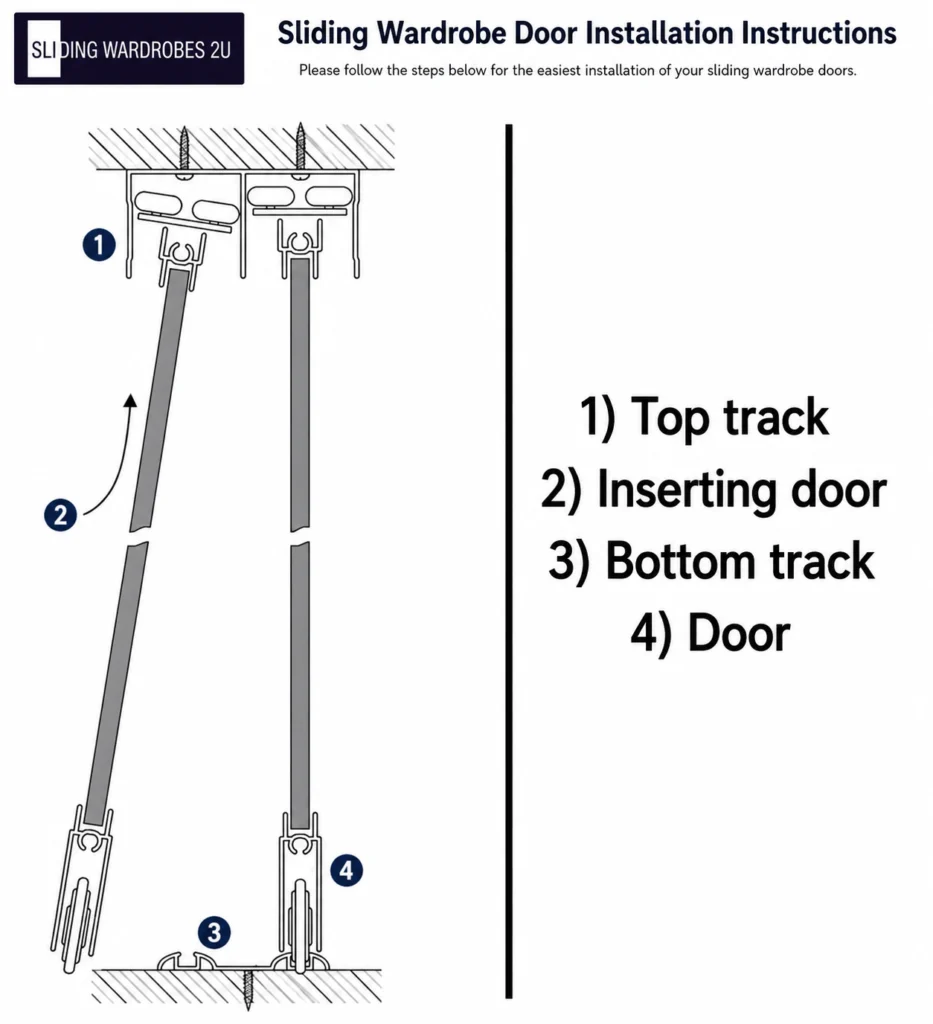
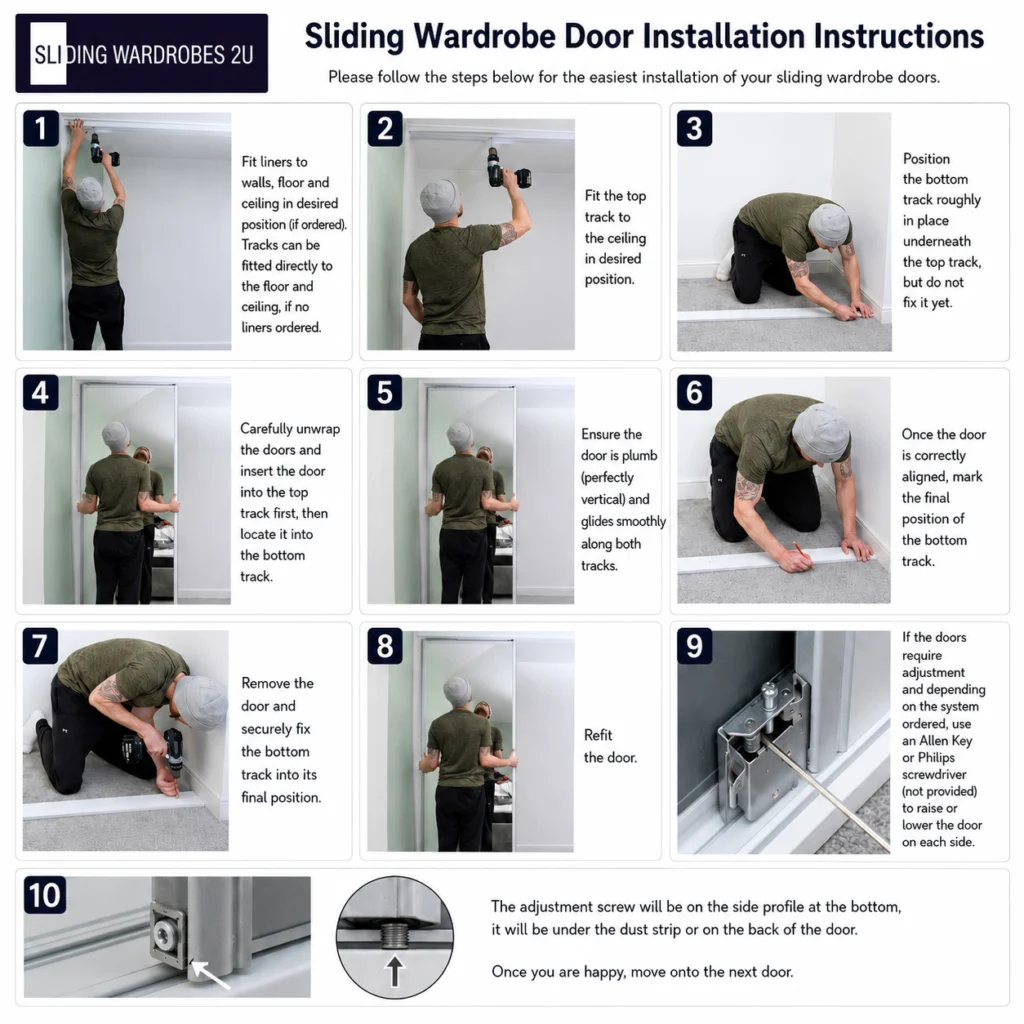
Sliding Wardrobe Door Installation Instructions
Please follow the steps below for the easiest installation of your sliding wardrobe doors.
- Fit liners to walls ,floor and ceiling in desired position ( if ordered ) Tracks can be fitted directly to the floor and ceiling , if no liners ordered.
- Fit the top track to ceiling in desired position.
- Position the bottom track roughly in place underneath the top track, but do not fix it yet.
- Carefully unwrap the doors and Insert the door into the top track first, then locate it into the bottom track.
- Ensure the door is plumb (perfectly vertical) and glides smoothly along both tracks.
- Once the door is correctly aligned, mark the final position of the bottom track.
- Remove the door and securely fix the bottom track into its final position.
- Refit the door.
If the doors require adjustment and depending on the system ordered ,use an Allen Key or Philips screwdriver ( not provided) to raise or lower the door on each side. - The adjustment screw will be on the side profile at the bottom, it will be under the dust strip or on the back of the door. Once you are happy move onto the next door.
Note: We do not supply screws, as we cannot know what surface our products will be fitted to. Depending on the installation, this could be brick, plasterboard, concrete, stone, timber, floorboards, or another material.If the tracks are being filled to floorboards and a plasterboard ceiling a standard wood screw and rawl plug is suitable.
Soft Closers
Note: Shaker Door Soft Closer instructions are further down this page.
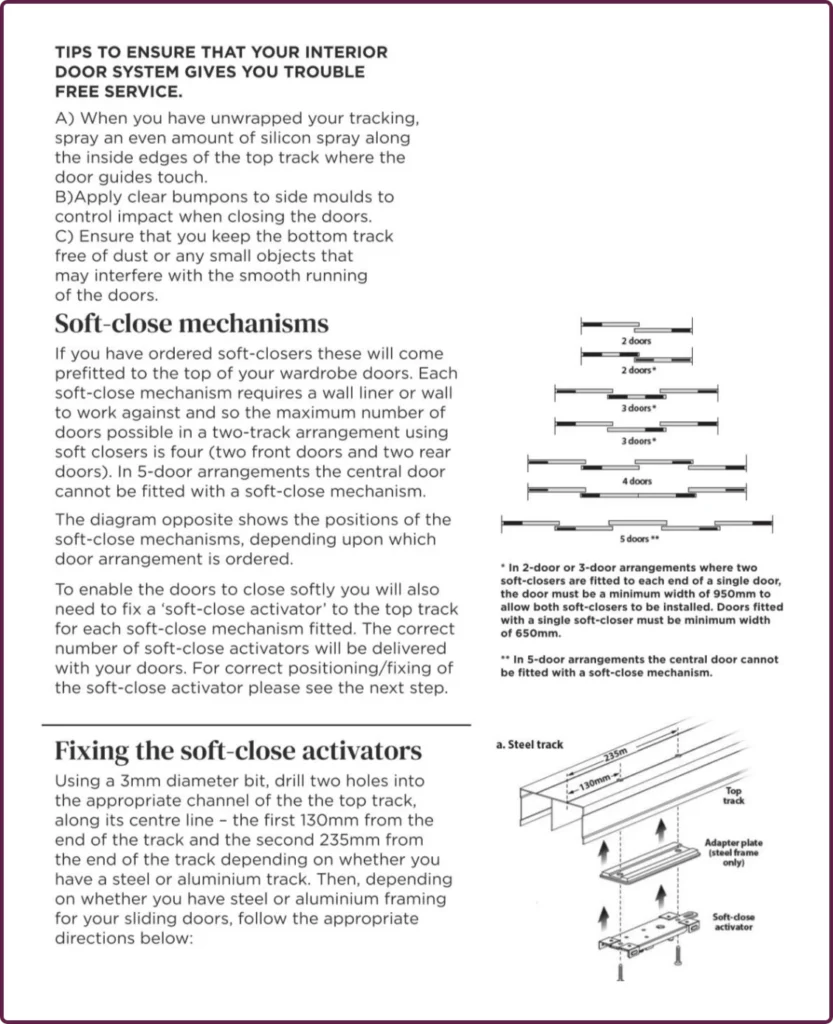
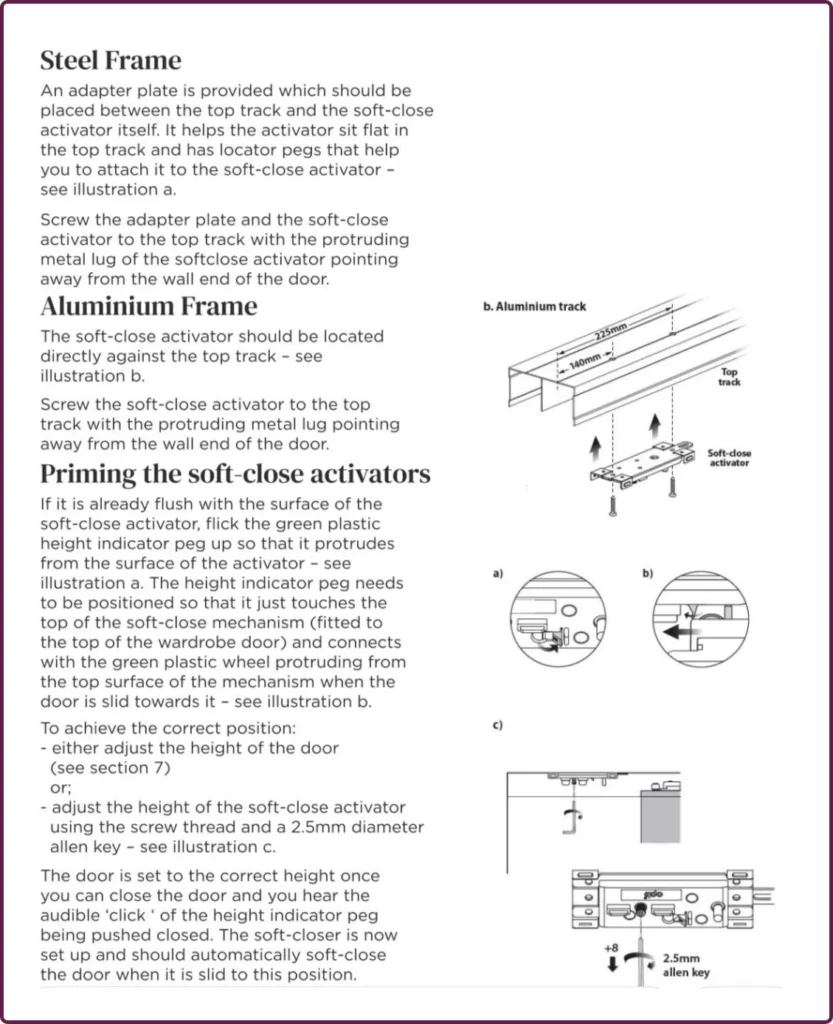
After the doors are fitted and gliding sucessfully on the tracks. You can fit the activator into the top track. Place the door in the position required , mark where the crown of the soft closer is into the track and then fix the activator.
Here at Sliding Wardrobes 2U we are always at the end of the phone for help and advice and have even been known to take video calls to advise on installation
Soft Closers (Shaker Doors Only)

